
July 12, 2012: Tech Tips #2: Adding Aftermarket Accessories
Aftermarket Car Accessories Help You Achieve Your Wildest Designs
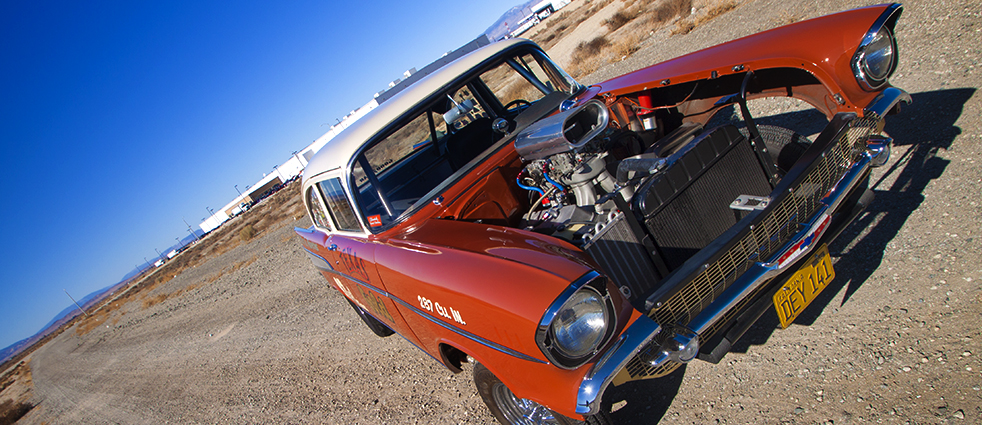
There is nothing on this planet greater then a Hotrod, and for those who enjoy these awesome machines they can form a dream like fascination that encompasses all that you do. Many of these automobiles are made to an extremely high standard, and there is an online source for performance accessories made to a similarly high standard. Our friends at Street Beat Customs offer a great selection of car accessories that can take your fantastic vehicle to a new level.
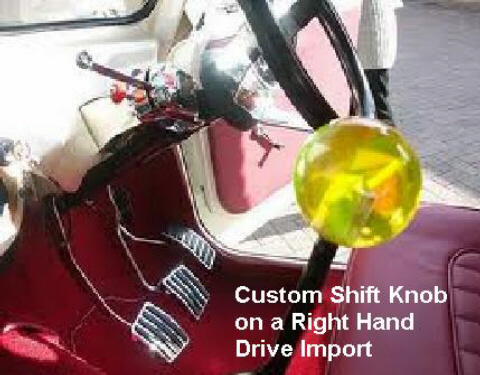
Generally, car accessories are aftermarket parts that are intended for a particular vehicle, intending to raise its level of performance, appearance or comfort. There are a huge number of different car accessories to choose from, and they range from being able to add in something as simple as hands free control over audio and GPS, to something as exotic as custom body parts, body kits, performance parts and specialty suspension.
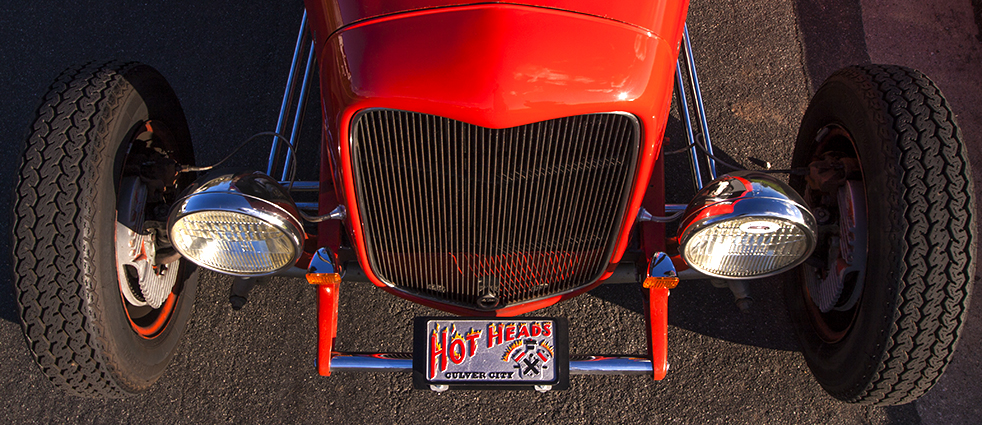
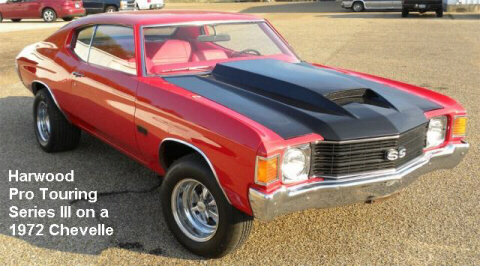
When you look at your hotrod have you ever wished that you could take a certain portion of it and change it? If this is something that you have considered doing, there are car accessories to change the appearance, from small details like the grill to the entire outward appearance. On more recent stock body vehicles this is done using something called body kits. These are pieces that are made from a variety of materials, depending upon what you are looking for, and they can allow you to transform your vehicle into something that is completely custom and personal.
You can also get an incredible level of performance from modern cars using things like performance parts and tuning chips. These are pieces that are crafted to dramatically enhance the way your engine and other onboard systems function and the results can be quite surprising. There are many people that report after they used some of these parts they were able to do things like increase the horsepower or add to their gas mileage. There are even those who claim they were able to clean up the emissions that their modern hotrod produced. Your results may vary.
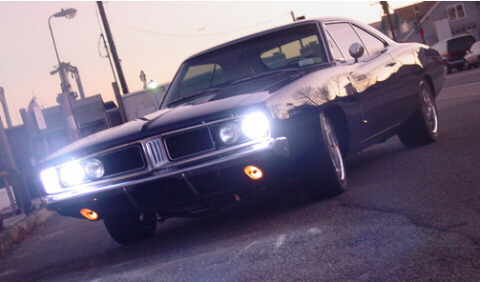
There are many different car accessories that you can get that also modify basic performance, to raise it to a level that will make your driving experience both more comfortable and safe. This can be done by adding items such as air suspension or changing your headlight system to HID bulbs. These are ultra bright and will enable you to see more of the road when you are out and about at night. Plus, it will make your vehicle look modern.
PLEASE NOTE: Some of these modifications may not be legal in your state or country, so always check with your local vehicle inspection authorities before buying or installing any of these parts.
Car accessories are available for just about any recent brand or model, and chances are if you can think about it, someone may have already made it. There is no longer any reason to settle for what you have, when you can make it even better.
December 1, 2011: Tech Tips #1: HID Headlight Conversions
Getting More Out Of Your Headlights: HID Conversion Kits
One of the most amazing things to happen to the automotive lighting industry in the past couple of decades has been the HID kit. The HID, or high intensity discharge is an extremely efficient headlight that is designed to give the driver the best overall viewing space possible. This is achieved by heating a special inert gas called xenon, and the result is a wider and farther reaching beam of brighter light. First introduced by BMW in 1991, HID kits are now widely available for nearly all makes and models of vehicles, including retrofitting classic cars.
Retrofitting is a technique that involves removing existing stock automobile parts and then either replacing or modifying them to make them work in a unique or better way. Retrofitting a HID kit for a classic car involves measuring the existing vehicle, replacing or cutting pieces to fit within a desired area, and then mounting and wiring when complete.
It doesn’t matter if your vehicle is a motorcycle, a utility or work truck, or a 1932 three window coupe, automobile enthusiasts can retrofit a xenon HID headlight system into their vehicle with a little ingenuity, and minimal effort. It is important to note that utilizing HID kits have been very popular, and their power efficiency and superior performance against the traditional sealed headlamps and halogen bulbs has been unquestionable. It is also important to address concerns that have been raised regarding Department of Transportation regulations, and whether or not they will approve these special lights.
HID lights can be street legal, however much of this depends upon the power usage you are using for your lights. This variation in power causes a shifting intensity of color and light emitted from the bulb. The higher the Kelvin (k) temperature, the deeper the color is and the less visible your output light will be. 4300K to 6000K is within the legal limit and this will give a color range from yellow to a ghostly blue. Anything above that temperature will result in a purple color, as well as a ticket.
Although it is relatively simple to install HID kits it is a good idea to first make sure that your vehicle is safe to work on. This can be done by simply turning your automobile off, putting the parking brake on, and waiting until the engine is completely cooled off before starting.
Begin by disconnecting the battery cables from the vehicles battery using a socket wrench. You will then need to remove the original bulb.
There are two general types of past and present headlights or headlamps used in the USA: sealed beam (either 7″ round or 7.9″ by 5.6″ rectangular) used in the USA from 1940 to 1983, and removable halogen bulbs which became available in the USA in 1984 and first used on the 1984 Lincoln Mark VII. There was then a gradual but quick transition with most automotive OEM sealed beam applications gone by 1990. The sealed beam lamps have only one component, as the filament is part of the glass housing. The removable lamps have two components, a removable halogen bulb and a clear plastic lens housing.
To retrofit and remove a sealed beam headlight, follow your service manual procedure to remove the sealed glass component, and disconnect the wiring harness plug from the back side.
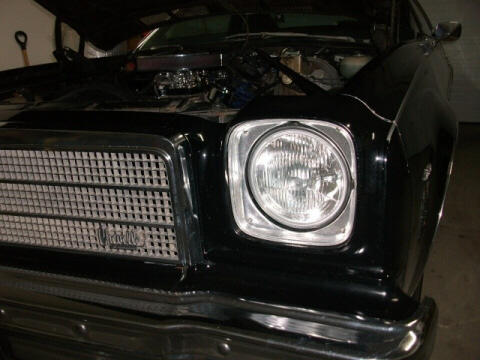
Shown below is a new conversion housing lens assembly, replacing the original sealed beam lamp on a 1974 Chevelle Malibu.
To retrofit and remove a removable bulb type headlight, follow your service manual procedure to first remove the screws or latches that are holding the original headlight housing assembly in place.
Once you have accomplished this you will be able to disconnect the wiring harness, then remove the bulb. Next, follow your service or owners manual instructions to remove the standard halogen bulb. It is a good idea to use your specific car’s manual to be certain how to properly remove the bulb and headlight assembly, as most vehicles are unique to their brand.
To remove most post 1983 halogen removable bulbs, you will need to twist the wires that are connecting it counter-clockwise, and then slide the bulb free. There may be a tab located in side that is keeping the halogen bulb in place, and you will need to also remove this before inserting the xenon bulb. When inserting any halogen or HID bulb be sure to not touch the bulb glass with bare hands. This can permanently damage it from skin oils or dirt. Use clean latex, cotton or mechanics gloves.
Show below is a typical removable halogen bulb.

When the new HID bulb is in place twist the wires clockwise to reconnect them. You will then need to connect the new wiring harness adapter with both the male and female bulb plugs into the ballast. The ballast is used to convert the cars 12V DC to a voltage that is capable of heating the xenon gas in the HID bulbs, and you will need to safely secure this in place under the hood.
Show below is a new wiring harness and ballast (drivers side headlight) installed under the hood of a 1974 Chevelle Malibu.
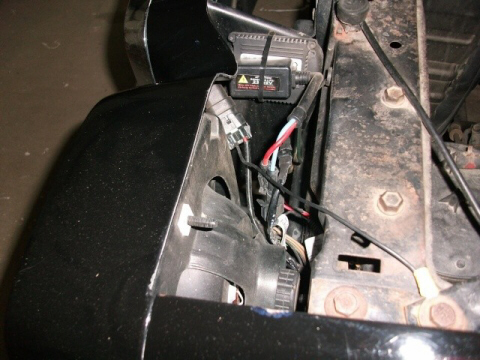
Once this is done plug in the original harness into the new harness ballast connectors. You will need to do this for each individual HID light. After you have completed the installation, go back through and double check to make sure all connections are secure before reconnecting your battery and testing your new HID headlights.
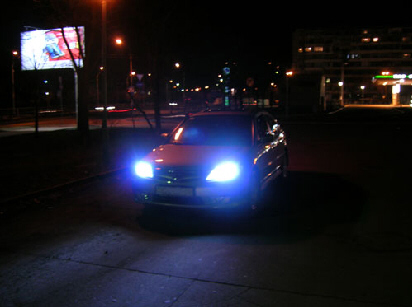
The picture below shows a typical HID installation in use in a newer vehicle. Note that this version has a blue appearance to the lights.
For more information on HID headlamp conversions and kits, visit our friends at HID Xenon Headlight Kits.
Leave a reply
You must be logged in to post a comment.